Overview
The Powerful CyberPanel image provides you a One-Click installer to automatically install OpenLiteSpeed, LSCache, WordPress, Prestashop, Joomla and contains all of the important features and this is easily available in a major cloud provider like Google Cloud, AWS, Azure. Please install Cyberpanel in Google Cloud as it is giving 300$ for A year period. It also gives you the power to automates the initial setup for major components like Mail service and DNS, to decrease the time it takes to get set up for hosting.
New Feature Released
- Docker Manager
- Incremental backup
- Redis Mass Hosting
- Imunify360 Integration
- Git Manager
Important Highlights From Cyberpanel
- Different Level Of users.
- Auto SSL.
- FTP Server.
- Light weight DNS Server (PowerDNS).
- PHPMYAdmin.
- Email Support (Rainloop).
- File Manager.
- PHP Management.
- Firewall.
- One click Backup and Restore.
- One click conversion from OpenLiteSpeed to LiteSpeed Enterprise.
Follow the Steps One by One

[su_button url=”https://cloud.google.com/marketplace” target=”blank” size=”5″ center=”yes” icon=”icon: google”]Google Cloud MarketPlace[/su_button]
|| Step-1|| We will go to Google Cloud market place and search for cyberpanel, and in the result, we can find Cyberpanel. Click on the Lunch button and deploy the as with your required resource. Here I have chosen “g1-small” which has 1 Virtual CPU and 1.7GB Memory which is enough for your website hosting from low traffic to medium.
If you still confuse how to deploy a virtual machine or appliance in Google cloud you can check this below Post, Where you find the solution and procedure for provisioning VM.
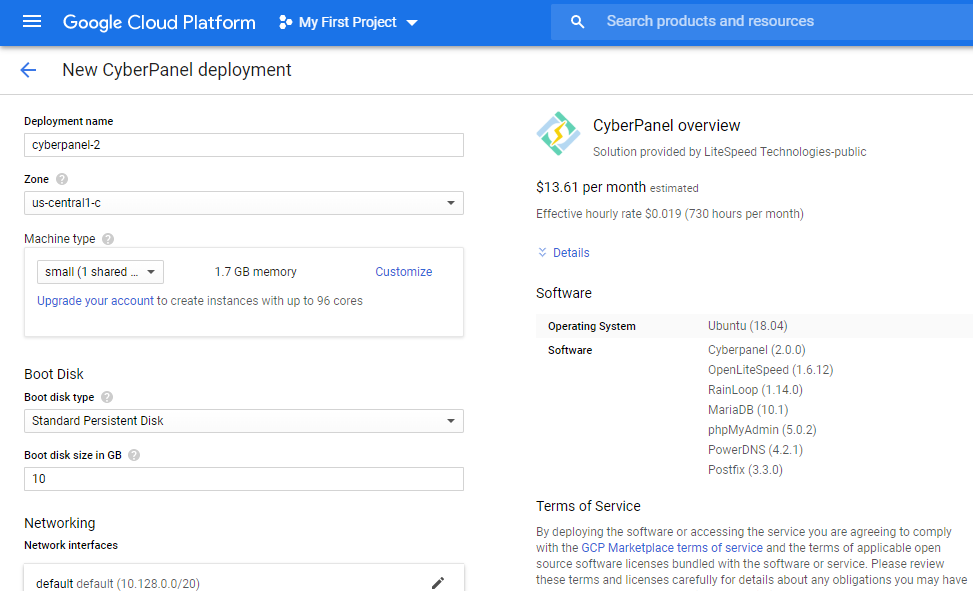
After giving all information for VM provisioning, Click on Submit. Please wait for some and allow the process to be completed.
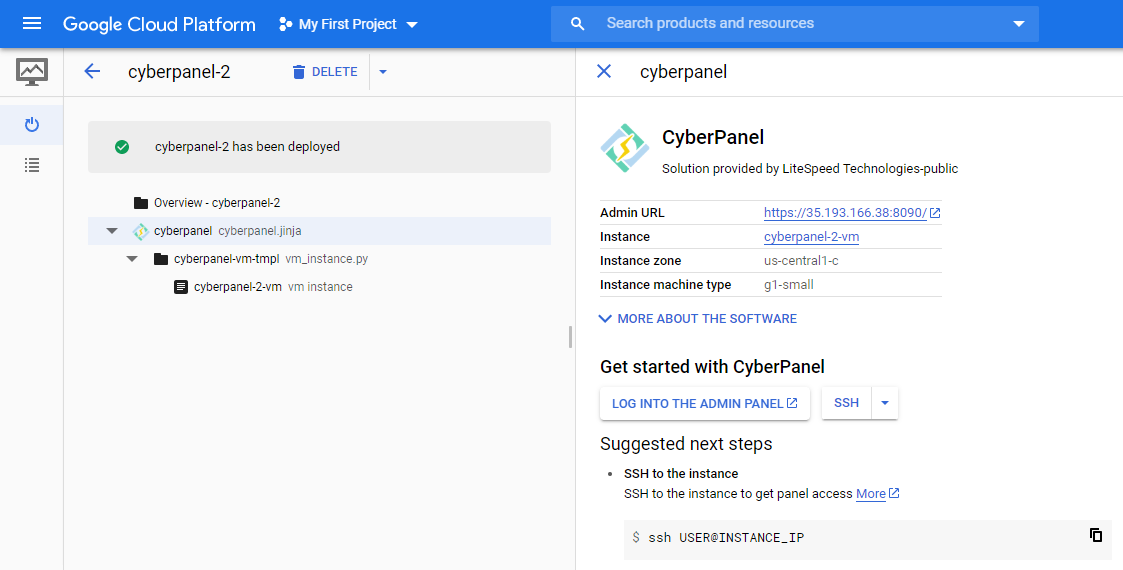
|| Step-2|| Now, the process has been successfully completed and you can see IP and Port details to access Cyberpanel Console. Next Step is login to console, before that we need to complete some post provisioning task with below network details received from Google Cloud, Example.
- PUBLIC IP : 35.193.166.38
- Cyberpanel Port : 8090
- URL For Console : https://35.193.166.38:8090/
We need to access SSH console of the VM to run some useful steps mentioned Below.
- Up to Date CyberPanel
- Retrieve Credential/Password of Cyberpanel.
- Get Password of PHPMyAdmin
It is little bit complex to setup and accessing SSH from Any Cloud Platform like Google Cloud for Beginner, Don’t worry, We have made easy lesson for you to access SSH console. Please follow the below guide !
[su_button url=”https://computemag.com/how-to-access-linux-vm-through-ssh-in-google-cloud/” target=”blank” style=”bubbles” size=”6″ center=”yes” id=”Check Here ! How to access Linux VM through SSH in Google Cloud”]Check Here to check access Linux VM through SSH in Google Cloud[/su_button]
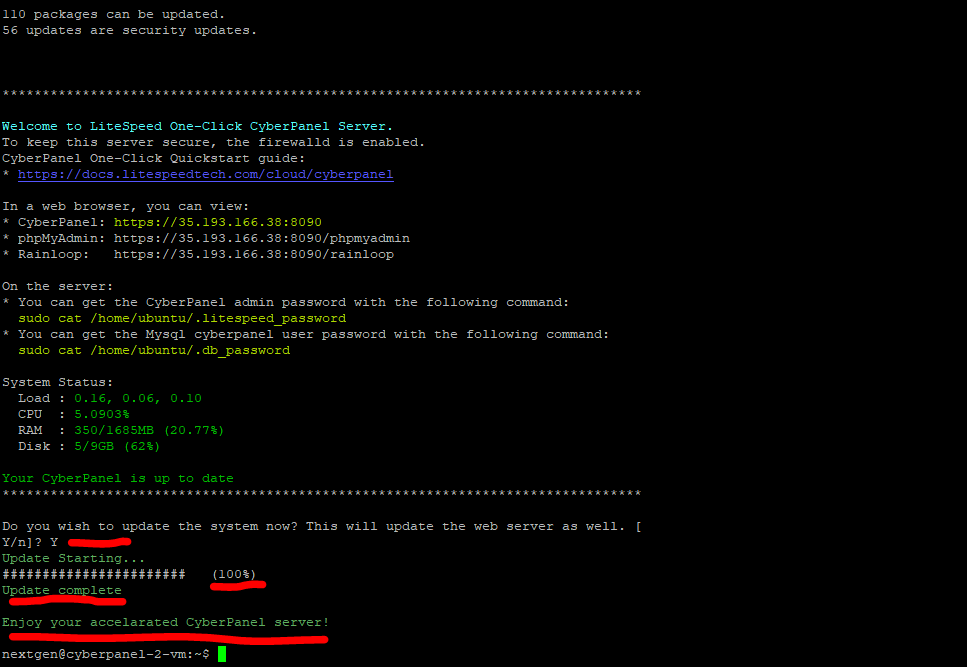
|| Step-3|| Now, We are in the SSH console. System will ask for an update in the very First step and just type ‘Y’, then hit ENTER. It will show you progress status and you will receive a message “Update Completion”.
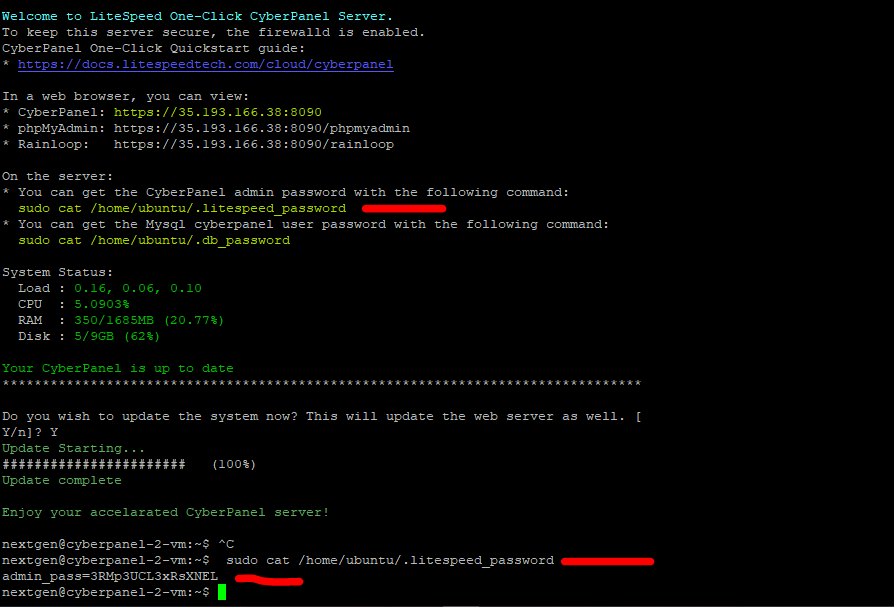
|| Step-4|| After Successful completion of the system update of Cyberpanel, the next task is getting ADMIN password to login the Cyberpanel Console. For that, we need to run command mention below,
[su_highlight background="#9f57f2" color="#ffffff"]sudo cat /home/ubuntu/.litespeed_password[/su_highlight]

Now, The password is reflected "admin_pass=xxxxxxxxxxxxxx"
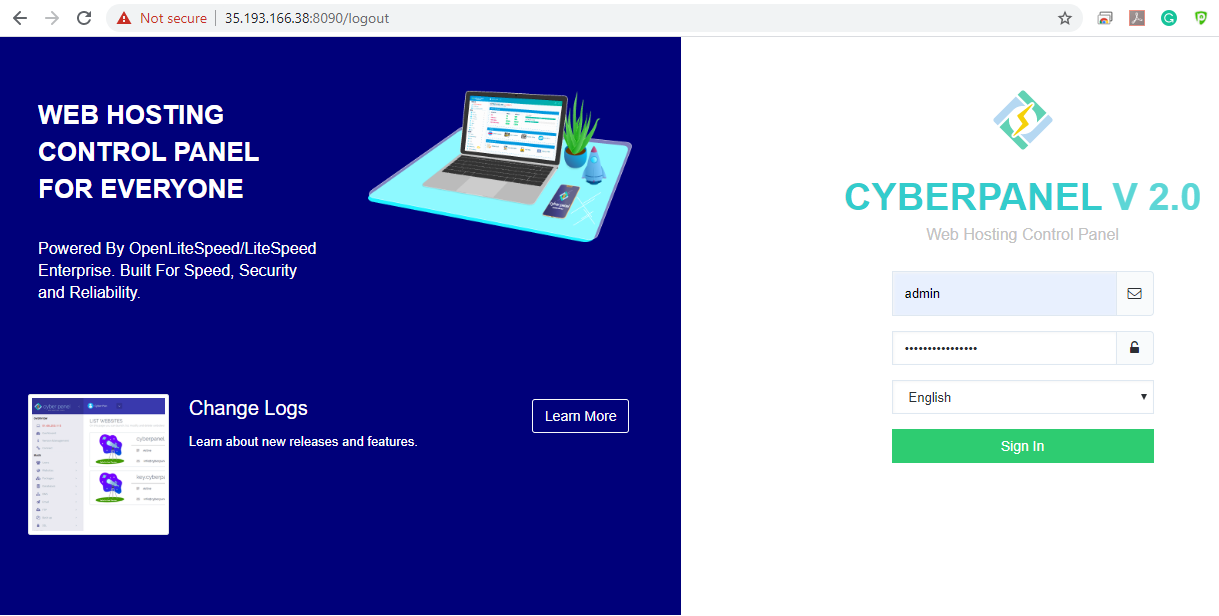
|| Step-5|| Now, You have the credential to login Cyberpanel console. Please enter user as “admin” and “password” and hit “Sign in” .
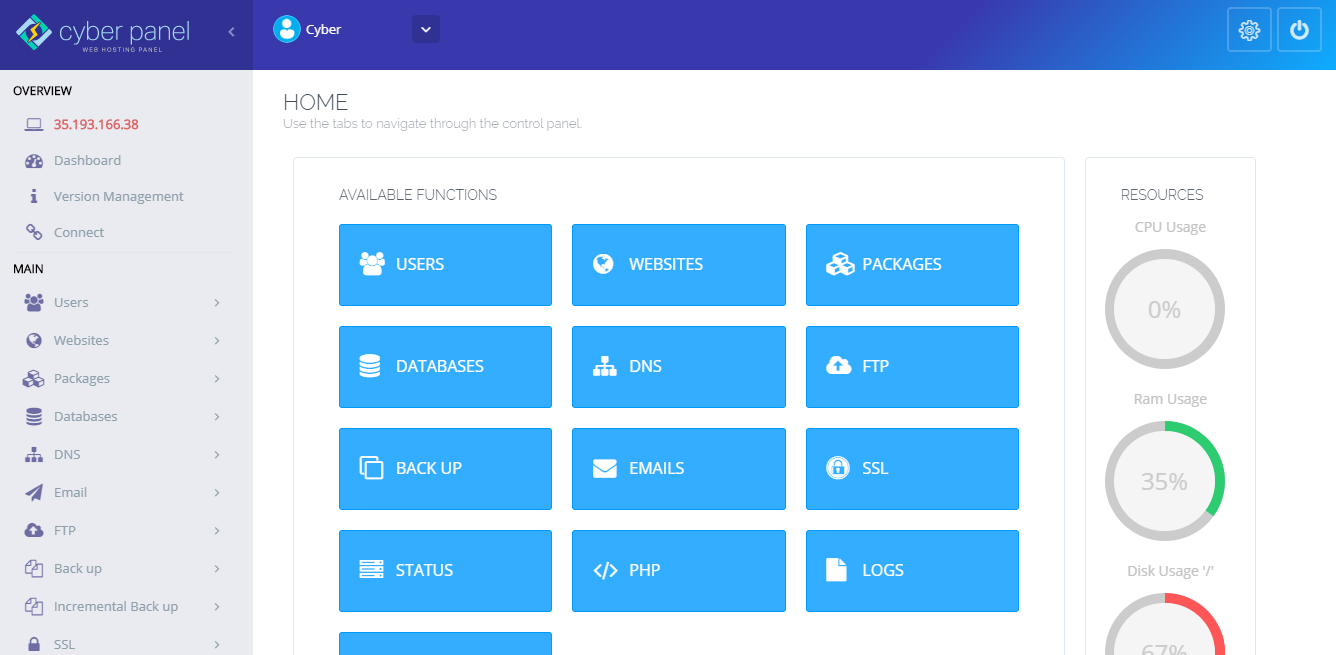
Hey, Now you have successfully login to cyberpanel.
Thank you ! and Thank you Again for not making this into a Elitist Rocket science project !
Straight forward advice that works.
Hello! I could have sworn I’ve visited this website before but after browsing through a few of the articles I
realized it’s new to me. Anyways, I’m certainly happy I
stumbled upon it and I’ll be book-marking it
and checking back regularly!
I take pleasure in, result in I found exactly what I used to be having a look for. You have ended my four day long hunt! God Bless you man. Have a nice day. Bye
Excellent post. I was checking continuously this blog
and I’m impressed! Very helpful information specially the last part :
) I care for such information a lot. I was
looking for this particular information for a long time.
Thank you and good luck.
What抯 Happening i am new to this, I stumbled upon this I have found It absolutely useful and it has helped me out loads. I hope to contribute & help other users like its aided me. Good job.